

Blog and Insights .
ECG Cables: The Complete Guide to Types, Connectors, Lead Configurations and Compatibility
Author:
Lub Dub Admin
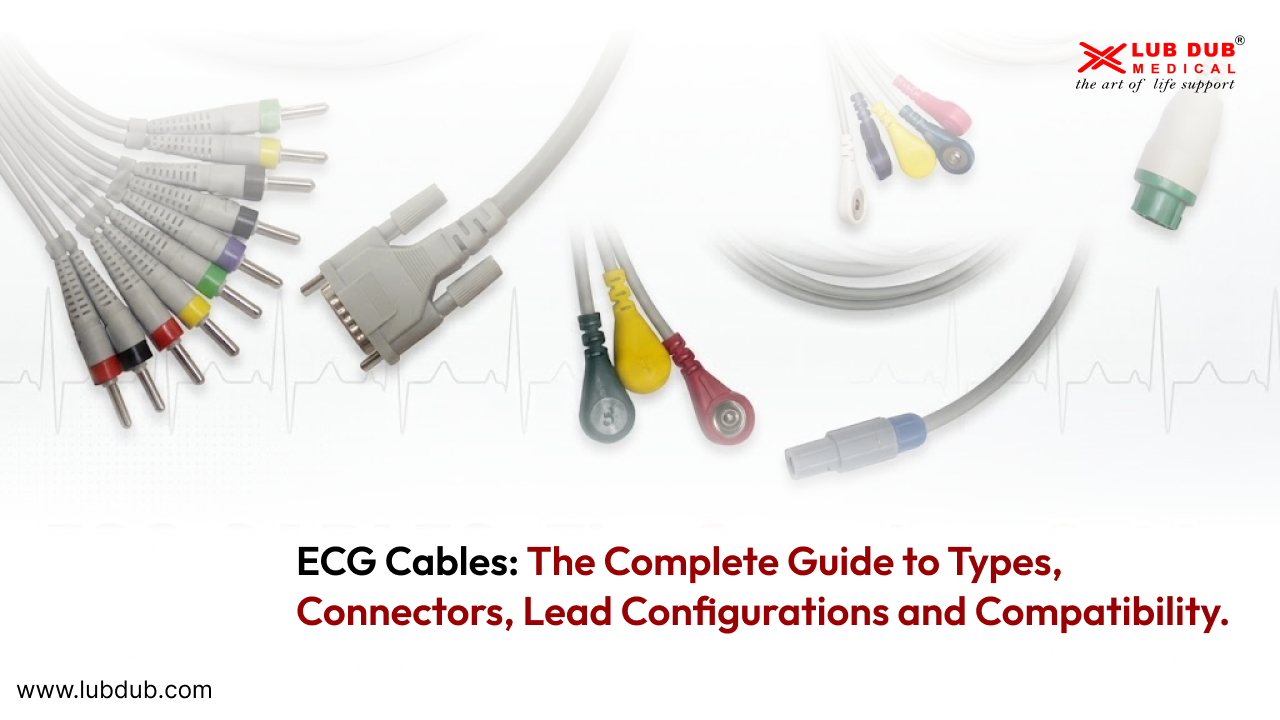
Introduction
If you’ve ever watched a heartbeat trace appear on a patient monitor, you’ve seen an ECG cable in action. It’s one of the most frequently used accessories in a hospital, but it’s often overlooked when it comes to selecting or replacing one.
This guide is for everyone who works with ECG cables from nurses connecting patients at the bedside, to biomedical engineers troubleshooting lead-off alarms, and procurement teams making sure the right cable is ordered for the right monitor.
We’ll begin with the basics and then get into the technical details that matter when evaluating an ECG cable. By the end, you’ll know what the different specifications mean, what to check before buying, and what to ask your supplier to avoid compatibility issues.
What Is an ECG Cable?
An ECG (electrocardiogram) cable connects the patient to an ECG machine or patient monitor and carries the heart’s electrical signals to the device for recording and display.
You can think of it as the link between the patient and the monitor. The heart produces very small electrical signals with each heartbeat. Electrodes placed on the skin pick up these signals, and the ECG cable carries them to the monitor, which processes and displays them as an ECG waveform.
The Basic Signal Path
Patient → ECG Electrodes → Lead Wires → Cable Connector → ECG Machine/Monitor → Display
● Electrodes are placed on specific areas of the patient’s skin.
● Lead wires pick up and carry the electrical signals from the electrodes.
● Connector connects the cable to the ECG machine or monitor.
● Monitor processes the incoming signals.
● The display shows the ECG waveform, heart rate, and rhythm information.
Why an ECG Cable Is More Than Just a Wire
An ECG cable may look simple, but it needs to handle very small electrical signals accurately while minimizing interference and signal distortion.
It also needs to have:
● The correct monitor-side connector
● The correct electrode connection
● Proper internal wiring and pin configuration
● Appropriate electrical characteristics
● Adequate shielding to reduce noise
A cable can look identical to another cable and still have a different internal wiring configuration. If the connections are incorrect, the monitor may display a noisy, incorrect, or misleading ECG signal.
That’s why ECG cable compatibility is about more than simply finding a cable that fits the monitor.
Why the Correct Cable Matters
Reliable ECG monitoring depends on more than placing the electrodes correctly. The cable also needs to be right for the monitor and the intended use.
It should:
● Match the monitor’s lead configuration
● Have the correct physical and electrical connector
● Maintain reliable signal quality during regular use
● Withstand repeated handling, cleaning, and movement
That’s why choosing an ECG cable is not simply a purchasing decision. Compatibility, signal quality, durability, and patient safety all need to be considered.
Quick Tip: Keep this simple distinction in mind: electrodes connect to the patient, lead wires carry the signal, and the cable and connector connect the leads to the monitor.
ECG Cable vs. ECG Lead Wire vs. ECG Electrode
These terms are often used interchangeably, even though they refer to different parts of the ECG setup. The exact terminology can also vary between manufacturers and suppliers, so it’s important to confirm what a product listing actually includes.
| Component | What It Does | Where It Connects |
|---|---|---|
| ECG Electrode | Picks up the heart’s electrical signal from the patient’s skin | Patient’s skin → lead wire |
| ECG Lead Wire | Carries the signal from an individual electrode | Electrode → trunk cable/connector |
| ECG Cable (Trunk Cable) | Brings multiple lead signals together and connects them to the monitor | Lead wires → monitor |
| Connector | Physically connects the different parts of the ECG signal path | Between cable, lead wire, electrode, or monitor |
A Note on Terminology
There is no single naming convention used across the industry. One supplier may call a complete lead-wire and trunk-cable assembly an “ECG cable,” while another may sell these as separate components.
There is also a technical difference between “lead” and “lead wire.” In ECG terminology, a lead refers to an electrical view of the heart, such as Lead I or Lead II. In everyday hospital and procurement conversations, however, “lead” is often used to describe the physical wire.
Quick Tip: If a listing says “5 Lead ECG Cable,” check exactly what you’re getting. It could mean a complete five-wire assembly, a trunk cable, or a cable with detachable lead wires. Always confirm the configuration before ordering.
Types of ECG Cables
ECG cables can be grouped mainly by the number of physical wires they carry and the type of monitoring they are designed for – such as continuous patient monitoring or diagnostic ECG recording.
Common Configurations
● 3-Lead ECG Cables – Used for basic rhythm monitoring with RA, LA, and LL electrodes.
● 5-Lead ECG Cables – Common in ICU, OT, and continuous monitoring, with an additional chest lead.
● 6-Lead Configurations – Used in some monitors that require additional limb or chest information.
● 10-Lead / 12-Lead ECG Cables – Used for diagnostic ECGs. Ten physical electrode connections are used to produce the standard 12 displayed ECG leads.
● Trunk Cables – Main cable connecting the monitor to the individual lead wires.
● Individual Lead Wires – Separate wires connecting electrodes to the trunk cable.
● Reusable ECG Cables – Designed for repeated use with appropriate cleaning and disinfection.
● Disposable Components – Certain lead-wire or electrode components may be intended for single or limited use.
● Patient-Monitor ECG Cables – Designed for continuous monitoring on bedside, ICU, and OT monitors.
● Diagnostic ECG Cables – Used with ECG machines and TMT/stress-testing systems for diagnostic recordings.
Quick Comparison
| Configuration | Typical Use | Physical Wires | Common Application |
|---|---|---|---|
| 3-Lead | Basic rhythm monitoring | 3 | Wards, ambulances, bedside monitors |
| 5-Lead | Continuous monitoring | 5 | ICU, OT, critical care |
| 10-Lead / 12-Lead | Diagnostic ECG | 10 | ECG machines, cardiology, TMT |
Important: The number of physical wires is not always the same as the number of ECG leads displayed. A standard 12-lead ECG uses 10 electrode connections to produce 12 displayed leads, with some leads derived mathematically from the electrode signals.
Understanding 3-Lead ECG
A 3-lead ECG configuration is one of the simplest and most commonly used setups for continuous bedside rhythm monitoring.
The Three Electrode Positions
● RA – Right Arm
● LA – Left Arm
● LL – Left Leg
For convenience, these electrodes are often placed on the upper chest, shoulders, or lower torso rather than directly on the limbs. Always follow the placement diagram provided by the monitor manufacturer.
Where 3-Lead ECG Is Used
3-lead monitoring is commonly used for:
● General ward monitoring
● Ambulance and patient transport
● Basic rhythm and heart-rate monitoring
● Continuous observation for rhythm abnormalities
3-Lead vs 12-Lead ECG
A 3-lead ECG is primarily designed for continuous rhythm monitoring, not detailed diagnostic assessment. It typically displays one or a limited number of leads at a time.
When a full diagnostic evaluation is needed such as when a heart attack is suspected – a 12-lead ECG is generally used.
Quick Tip: 3-lead ECG is ideal for watching rhythm continuously; 12-lead ECG provides a much more detailed view for diagnostic assessment.
Understanding 5-Lead ECG
A 5-lead configuration adds a fourth limb electrode and a chest (precordial) electrode to the basic 3-lead setup, giving clinicians more information without requiring a full diagnostic cable.
The Five Electrode Positions
● RA – Right Arm
● LA – Left Arm
● RL – Right Leg
● LL – Left Leg
● Chest/Precordial Lead (V) – Placed on the chest at a position determined by the monitor’s placement guide
For convenience, these electrodes are often placed on the upper chest, shoulders, or lower torso rather than directly on the limbs. Always follow the placement diagram provided by the monitor manufacturer.
Why 5-Lead Monitoring Is Useful
The addition of the RL (right leg) electrode and a chest lead allows:
● Simultaneous display of more monitoring leads
● Better arrhythmia detection in many clinical scenarios
● A closer approximation of clinically useful chest-lead information than 3-lead monitoring provides
Common Applications
5-lead ECG cables are widely used in:
● ICUs and critical care units
● Operating theatres
● High-dependency and step-down units
● Any setting requiring continuous, more detailed rhythm monitoring
Monitoring vs. Diagnostic ECG
It’s worth restating clearly: even a 5-lead setup is designed for continuous monitoring, not for generating a full 12-lead diagnostic report. The chest lead in a 5-lead system provides useful additional information, but it is not equivalent to the six precordial leads (V1–V6) recorded in a diagnostic 12-lead ECG.
Understanding 12-Lead ECG
A standard diagnostic 12-lead ECG is the gold-standard tool for detailed cardiac assessment, used in cardiology departments, emergency rooms, and diagnostic centres.
Electrode Placement
A 12-lead ECG uses:
● 4 limb electrodes – placed on the right arm, left arm, right leg, and left leg
● 6 precordial (chest) electrodes – placed at specific positions across the chest, labelled V1 through V6
That’s 10 physical electrodes in total.
The 12 Displayed Leads
● Limb leads: I, II, III
● Augmented limb leads: aVR, aVL, aVF
● Precordial (chest) leads: V1, V2, V3, V4, V5, V6
How 10 Electrodes Produce 12 Leads
This is a common point of confusion, so it’s worth explaining simply. The three standard limb leads (I, II, III) and the three augmented limb leads (aVR, aVL, aVF) are all derived from the electrical differences measured between the same four limb electrodes – the machine calculates these six leads mathematically from the same underlying signals, rather than requiring six separate limb electrodes. The six precordial leads (V1–V6), on the other hand, do require six separate chest electrodes, since each one measures a distinct point on the chest relative to a reference point.
So: 4 limb electrodes + 6 chest electrodes = 10 physical connections, which the ECG machine’s internal circuitry processes into 12 displayed leads.
The Key Distinction to Remember
3-lead monitoring ≠ 5-lead monitoring ≠ diagnostic 12-lead ECG.
Each configuration serves a different clinical purpose:
● 3-lead and 5-lead cables are designed for continuous bedside/ICU rhythm monitoring
● 12-lead (10-electrode) cables are designed for detailed diagnostic recording
Using the wrong configuration for the wrong clinical purpose is a common and avoidable error – always confirm what the clinical requirement actually is before selecting a cable.
ECG Connector Types
Once you understand lead configurations, the next important factor is the connector. ECG cables use different connector types on the patient side and monitor side, and choosing the wrong one can result in poor or no signal.
Common Connector Types
Patient-side connectors – connect the lead wire to the electrode:
● Snap connectors – Press onto snap-style disposable electrodes.
● Clip connectors – Spring-loaded clips that attach to tab-style electrodes.
● Banana-type connectors – Cylindrical pins, commonly used with reusable electrodes.
Device-side connectors – connect the trunk cable to the monitor or ECG machine:
● Pin connectors – Multi-pin plugs designed to match the monitor socket.
● Proprietary connectors – Brand- or model-specific connectors with particular shapes and pin configurations.
Connector Terminology
Product listings may describe connectors using terms such as:
● 2 mm, 3.5 mm, or 4 mm – referring to pin or connector diameter, depending on the connector type.
● Snap, Clip, or Banana – describing how the lead wire connects to the electrode.
● Pin-type – generally referring to the multi-pin monitor-side connector.
A Connector That Fits May Still Be Wrong
This is one of the most important points to remember:
Physical fit ≠ electrical compatibility ≠ functional compatibility.
A connector may physically fit the monitor but still have different pin assignments or internal wiring. In that case, the ECG signal may not be transmitted correctly.
The cable also needs to support the functions expected by the monitor, such as lead-off detection and specific monitoring configurations.
Quick Tip: Never select an ECG cable based on connector appearance alone. Always verify the connector type, pin configuration, wiring, and exact monitor model before purchasing.
ECG Cable Connectors & Patient Monitor Compatibility
Because a cable fitting the monitor does not automatically mean it is compatible, a few key details should always be checked before purchase.
What to Verify
● Monitor brand and exact model
● Hardware/software revision, where applicable
● Device-side connector type
● Connector size and pin count
● Pin configuration, if available
● Required number of leads
● Lead configuration – 3-lead, 5-lead, or 12-lead
● Internal cable wiring
● Patient-side connector type
● Intended use – continuous monitoring or diagnostic ECG
● Adult, pediatric, or neonatal requirements, where applicable
Why Similar-Looking Cables Can Be Different
Two ECG cables can have the same-looking connector and even the same number of pins, yet have different internal wiring.
For example, the signal from an RA or LA lead may be assigned to different pins in two otherwise similar-looking cables. Using the wrong cable can therefore result in missing, reversed, or incorrect ECG signals, even though the connector fits perfectly.
That’s why “it fits the socket” should only be the starting point – not the final compatibility check.
Note: Exact pin assignments can vary by manufacturer, model, and product revision. Always confirm them using the appropriate manufacturer documentation or a verified technical reference before use.
How to Check ECG Cable Compatibility Before Buying
Rather than choosing an ECG cable based on appearance alone, use a simple verification process.
Step-by-Step Compatibility Checklist
1. Identify the monitor or ECG machine brand.
2. Confirm the exact model and revision, if applicable.
3. Check the original cable or part number, if available.
4. Confirm the required lead configuration – 3-lead, 5-lead, or 10/12-lead.
5. Check the device-side connector – type, size, and pin count.
6. Check the patient-side connector – snap, clip, banana, etc.
7. Verify the pin configuration using reliable technical documentation.
8. Confirm the intended use – continuous monitoring or diagnostic ECG.
9. Review key specifications such as length, shielding, and materials.
10. Get compatibility confirmation from the supplier in writing.
11. Test the cable where required before bulk purchase, with biomedical approval.
12. Record the approved cable and part number for future reordering.
Why “It Fits” Isn’t Enough
A cable can physically connect to a monitor and still be unsuitable. Incorrect wiring or configuration may result in:
● Incorrect or missing ECG signals
● Lead-off alarms not working as expected
● Excessive noise or signal distortion
● Problems with monitor-specific functions such as arrhythmia or ST analysis
The safest approach is simple: verify the cable against the exact monitor model and technical requirements – not just the connector.
ECG Cable Colour Coding
ECG lead wires are colour-coded to help clinical staff identify and place electrodes correctly. However, there are different colour-coding systems, so the colours should not be assumed to be the same across all hospitals and equipment.
Common Colour-Coding Systems
● IEC – Commonly used in international and European settings
● AHA – Commonly used in the United States and some other markets
The colours assigned to the same electrode positions can differ between these two systems. This means an IEC cable and an AHA cable may use different colours for RA, LA, RL, LL, and chest leads.
Why It Matters
● Staff familiar with one system may accidentally misplace electrodes when using another.
● Hospitals using equipment from different manufacturers may have both systems in use.
● Colour coding should always be checked against the cable label or manufacturer documentation.
Quick Tip: When introducing a new ECG cable or supplier, confirm whether it follows IEC or AHA colour coding and make sure clinical staff are aware of the difference.
ECG Cable Quality - What to Look For
Not all ECG cables offering the same lead count and connector type are equal in quality. Several dimensions matter.
Electrical Considerations
● Signal integrity – the cable should transmit the ECG signal without introducing distortion
● Electrical continuity – consistent, reliable conduction along the full length of each lead wire
● Shielding, where applicable, to reduce susceptibility to electrical noise/interference from nearby equipment
● Connector reliability – a stable, low-resistance connection at each interface point
Mechanical Considerations
● Flexibility – the cable should be comfortable to handle and route around a patient bed
● Strain relief at connector junctions, to reduce stress on internal wiring during handling
● Connector durability – resistance to wear from repeated plugging/unplugging
● Cable jacket quality – material that withstands repeated bending and cleaning
● Pull resistance – the cable and connectors should tolerate reasonable accidental tension without failing
● Connector retention – a secure, snug fit that resists accidental disconnection
Patient-Related Considerations
● Skin-contacting materials, where the cable or associated electrode components directly touch the patient
● Biocompatibility considerations, where relevant to the product
● Cleaning and reprocessing requirements, as specified by the manufacturer
● Infection-control considerations, particularly for reusable components used across multiple patients
Manufacturing Considerations
● Quality control during production
● Traceability of components and batches
● Consistency across units of the same product
● Testing prior to dispatch
● Documentation available to support hospital procurement and biomedical verification processes
We won’t cite specific performance numbers here, since those vary by product and should be confirmed directly from the manufacturer’s technical documentation rather than assumed.
Reusable vs. Disposable ECG Cables/Components
Hospitals often choose between reusable and disposable ECG accessories, particularly at the electrode and lead-wire level. The best option depends on the clinical setting, infection-control requirements, and overall cost.
| Factor | Reusable | Disposable |
|---|---|---|
| Initial cost | Usually higher | Usually lower |
| Reuse | Multiple uses with proper cleaning | Single or limited use |
| Cleaning | Required between patients | Generally not required |
| Infection control | Requires proper reprocessing | Helps reduce cross-contamination risk |
| Durability | Designed for repeated use | Not designed for extended reuse |
| Waste | Less ongoing waste | More consumable waste |
| Replacement | Less frequent | More frequent |
| Long-term cost | Depends on cleaning and usage | Depends on patient volume |
Making the Choice
There is no one-size-fits-all answer. Consider the clinical environment, infection-control policy, manufacturer instructions, patient volume, and total cost of ownership.
A hybrid approach is also common – using reusable trunk cables and lead wires with disposable ECG electrodes.
Adult, Pediatric & Neonatal Considerations
What Can Differ?
● Patient size – Determines appropriate electrode size and placement.
● Lead and connector configuration – Some monitors use different accessories for adult, pediatric, or neonatal applications.
● Electrode suitability – Smaller or more sensitive skin may require appropriately designed electrodes.
● Clinical environment – NICU, pediatric ICU, and adult wards may have different monitoring needs.
● Cable handling – Smaller patients may benefit from shorter or more flexible cable setups.
● Infection control – Cleaning and reprocessing requirements can vary between departments.
● Monitoring needs – Required lead configurations may differ depending on the clinical application.
Important Note
Not all ECG cables are specifically labelled adult, pediatric, or neonatal. Many trunk cables and lead-wire sets are general-purpose and are used with age-appropriate electrodes.
Always rely on the manufacturer’s specifications and intended-use information when selecting accessories for a particular patient population.
Common ECG Cable Problems and Troubleshooting
ECG cables are handled frequently, so issues such as loose connections, damaged wires, and signal noise are fairly common. The table below provides a quick reference for clinical and biomedical teams.
| Problem | Possible Cause | What to Check | Possible Solution |
|---|---|---|---|
| No ECG waveform | Loose cable or poor electrode contact | Connector and electrode contact | Reseat connector or replace electrode |
| Intermittent signal | Loose connector or damaged wire | Cable and connectors | Replace cable if fault is confirmed |
| Noisy ECG trace | Poor shielding, interference, or poor electrode contact | Nearby equipment and electrodes | Reduce interference and check electrodes |
| Lead-off alarms | Loose electrode, damaged lead, or incorrect placement | Electrode, cable, and placement | Reapply electrode or check cable |
| Loose connector | Worn or incorrect connector | Connector fit and retention | Replace cable/connector |
| Broken lead wire | Bending, pulling, or wear | Inspect cable and lead wires | Replace damaged component |
| Damaged insulation | Wear or cleaning chemicals | Inspect outer cable | Replace cable and review cleaning process |
| Poor electrode contact | Dried gel or incorrect application | Electrode condition and skin preparation | Replace electrode and prepare skin correctly |
| Incorrect lead placement | Colour-code or placement confusion | Check against monitor diagram | Correct placement and retrain staff |
| Wrong cable configuration | Incorrect cable selected for the application | Clinical requirement vs. cable type | Use the appropriate configuration |
| Incompatible cable | Cable not verified for the monitor | Model and compatibility information | Replace with a verified cable |
| Internal conductor damage | Repeated bending or pulling the cable | Continuity test, where appropriate | Replace the cable |
Quick Tip: Always disconnect an ECG cable by holding the connector, not by pulling the wire. This simple habit can help prevent internal wire damage and extend cable life.
ECG Cable Maintenance Best Practices
Proper care can extend the life of an ECG cable and help maintain reliable signal quality.
● Cleaning: Use only cleaning agents and methods recommended by the manufacturer.
● Disinfection: Follow both the manufacturer’s instructions and your hospital’s infection-control protocol.
● Storage: Coil cables loosely and keep them away from heat, sunlight, and sharp edges.
● Handling: Avoid tight bends, kinks, and excessive pulling, especially near connectors.
● Disconnecting: Always hold the connector when unplugging — never pull the cable.
● Connector care: Keep connectors clean and dry, and free from gel or other debris.
● Visual inspection: Check regularly for cracks, exposed wires, or damaged connectors.
● Functional checks: Perform continuity or functional testing periodically, especially for high-use ICU and OT cables.
● Replacement: Replace cables with visible damage, intermittent faults, or failed testing rather than waiting for complete failure.
Important: Always follow the specific manufacturer’s instructions for use (IFU), as cleaning, disinfection, and maintenance requirements can vary between products.
How Hospitals Should Select ECG Cables - A Procurement Guide
Procurement decisions for ECG cables should weigh multiple factors together, not price alone.
Decision Factors
● Compatibility — verified against the specific monitor/machine model
● Quality — electrical, mechanical, and manufacturing quality, as discussed in Section 11
● Safety — appropriate materials and design for patient contact
● Reliability — consistent performance across the product’s working life
● Documentation — availability of technical specifications and compatibility information
● Availability — consistent stock and reasonable lead times
● Price — upfront unit cost
● Total Cost of Ownership (TCO) — the real cost over time, not just the purchase price
● Warranty — coverage terms offered by the supplier
● Technical support — availability of a knowledgeable point of contact
● Supplier experience — track record in medical accessories
● Replacement availability — how easily the same product can be reordered in future
Why the Cheapest Cable Isn’t Automatically the Best Choice
A lower-priced cable that fails frequently, causes downtime, or generates repeated lead-off alarms can end up costing more than a higher-quality alternative, once staff time, patient monitoring disruptions, and replacement frequency are factored in.
A Simple Total Cost of Ownership Example
Consider two hypothetical cables for the same monitor:
● Cable A costs less upfront but needs replacement roughly twice as often due to connector wear.
● Cable B costs more upfront but has a longer average working life before replacement is needed.
Over a year of similar usage, Cable B may cost less overall once the replacement frequency of Cable A is factored in — even though its sticker price is higher. This is the essence of Total Cost of Ownership thinking: evaluate the full lifecycle cost, not just the invoice.
(This example is illustrative only — actual costs depend on your specific usage volume, product quality, and supplier pricing.)
OEM vs. Compatible ECG Cables
Hospitals generally choose between OEM ECG cables supplied or branded by the original monitor manufacturer and compatible cables made by third-party manufacturers for specific monitor brands and models.
OEM ECG Cables
● Supplied or branded by the original equipment manufacturer
● Usually the standard reference for device compatibility
● Often supported through the OEM’s service network
Compatible ECG Cables
● Made by third-party accessory manufacturers
● Designed to match the monitor’s connector, wiring, and functional requirements
● May offer advantages in price, availability, and lead time
Which Is Better?
Neither option is automatically better.
The important factors are physical compatibility, electrical performance, functional compatibility, clinical suitability, and product quality.
A well-manufactured compatible cable can provide reliable performance when properly matched and verified for the intended monitor. However, quality can vary between suppliers, so proper verification is essential before use.
In short: choose the cable based on verified compatibility and quality — not simply on whether it is OEM or compatible.
[Internal Link: OEM vs Compatible Medical Accessories Guide]
How to Read an ECG Cable Product Description
ECG cable listings often include several specifications in a short title. Knowing what each part means can help you avoid ordering the wrong cable.
Example: “5 Lead ECG Cable – Compatible with [Monitor] – 3.5 mm Snap – 2 m”
● “5 Lead” — Indicates the lead configuration.
● “Compatible with [Monitor]” — Identifies the intended monitor brand/model.
● “3.5 mm Snap” — Describes the patient-side connector.
● “2 m” — Indicates the cable length.
What the Listing May Not Tell You
Before purchasing, also verify:
● Exact monitor model and revision
● Device-side connector and pin configuration
● Reusable or disposable/limited-use design
● IEC or AHA colour coding
● Technical documentation supporting compatibility
● Warranty and after-sales support
Quick Tip: A product title gives you the basic specifications, but it should never replace proper compatibility verification.
10 Common Mistakes to Avoid When Buying ECG Cables
10 Common Mistakes When Buying ECG Cables
Avoid these common mistakes when selecting or replacing ECG cables:
1. Choosing by connector appearance – A similar-looking connector does not guarantee compatibility.
2. Ignoring the exact monitor model – Brand-level matching is not enough; the specific model matters.
3. Confusing leads and electrodes – This can result in ordering the wrong quantity or configuration.
4. Assuming connectors are interchangeable – “Pin-type” or “snap-type” can refer to different designs.
5. Assuming all 5-lead cables are the same – Internal wiring and pin configurations can vary.
6. Ignoring colour coding – IEC and AHA systems use different colour conventions.
7. Checking only pin count – The number of pins alone does not confirm compatibility.
8. Choosing based only on price – Consider reliability and total cost of ownership.
9. Ignoring cleaning requirements – Incorrect cleaning can damage cables and affect their lifespan.
10. Skipping technical documentation – Always seek clear compatibility information from the supplier.
The simple rule: verify the complete cable specification – not just how it looks or how much it costs.
Choosing the Right ECG Cable Supplier
Choosing an ECG cable supplier is not just about finding a product that fits. The right supplier should be able to support compatibility verification, documentation, quality, and long-term supply.
Look for a supplier that provides:
● Clear compatibility information for specific monitor brands and models
● Multiple lead configurations and connector options
● Detailed technical specifications
● Product documentation and IFUs
● Evidence of a proper quality system
● Consistent supply and reasonable lead times
● Technical support before and after purchase
● Customization options when standard configurations don’t meet your requirements
● Reliable availability for future replacements
Important: Always follow the specific manufacturer’s instructions for use (IFU), as cleaning, disinfection, and maintenance requirements can vary between products.
As a manufacturer and supplier of medical accessories, Lub Dub Medical Technology Pvt. Ltd. offers ECG cables and lead wires along with SpO2 sensors, NIBP cuffs, temperature probes, IBP accessories, and other patient-monitoring products.
Need help identifying the right ECG cable? Share your monitor or ECG machine brand, model number, and existing cable details with the Lub Dub Medical team, and we can help you identify the appropriate configuration.
FAQ
Find Out Answers Here
An ECG cable connects the patient’s electrodes to an ECG machine or patient monitor and carries the heart’s electrical signals to the device.
An ECG cable or trunk cable usually connects to the monitor, while individual lead wires connect the cable to the electrodes. Terminology can vary between manufacturers.
Common types include 3-lead, 5-lead, and 10-lead/12-lead diagnostic cables, as well as trunk cables and individual lead wires.
It connects RA, LA, and LL electrodes and is mainly used for continuous rhythm monitoring.
It uses RA, LA, RL, LL, and a chest lead and is commonly used for continuous monitoring in settings such as ICUs and OTs.
A diagnostic 12-lead ECG typically uses 10 physical electrode connections to generate 12 displayed leads.
A 5-lead setup provides additional monitoring information, including a chest lead, while 3-lead is mainly used for basic rhythm monitoring.
Monitoring ECG is designed for continuous rhythm observation, while diagnostic 12-lead ECG provides a more detailed recording for clinical assessment.
Patient-side connectors include snap, clip, and banana-type connections. Device-side connectors vary by monitor and may use multi-pin or proprietary designs.
Check the exact monitor model, lead configuration, connector types, pin configuration, and technical specifications. Confirm compatibility through reliable documentation.
No. ECG cables are designed for specific devices and configurations. An unverified cable may not provide correct signal transmission.
No. Physical fit does not guarantee electrical or functional compatibility. Internal wiring and pin assignments must also match.
IEC is a commonly used ECG colour-coding system associated with international and European standards.
AHA is another ECG colour-coding system, commonly associated with American conventions. Its colours differ from IEC for some electrode positions.
There is no universal replacement period. Replace cables when they show damage, intermittent faults, or fail functional/continuity checks.
Follow the cable manufacturer’s cleaning and disinfection instructions and use only recommended cleaning agents.
They can be, when properly manufactured and verified for the intended monitor and application. Quality, testing, and compatibility are more important than the OEM or compatible label alone.
They typically check device compatibility, connectors, pin configuration, continuity, signal quality, documentation, and intended clinical use.
Consider compatibility, quality, safety, reliability, documentation, total cost of ownership, warranty, technical support, and supplier reliability – not just the purchase price.